Outputting to Flash can be simple or if the project requires it, it can be more complex. The default settings for the Flash output will be enough for most projects. Therefore we suggest, outputting with the defaults first, using the Basic Steps as a guide, to see what they will produce. It’s possible, however, that the project may require a bit more customization. For this, we’ve added a more detailed tutorial that highlights the more significant options of the Flash output.
The Basic Steps
- Import with either the Light Table or Select Input option.
- Choose Flash, from the New Output Format menu in the Output section, and then click Add. The Flash settings window will appear.
- Click OK in the bottom right corner of the window to output the Flash movie.
Beyond the Basics
- Follow steps 1-2 from above.
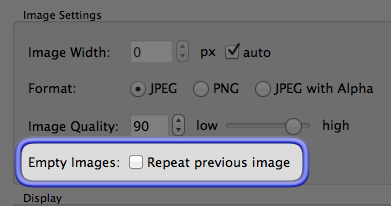
- In the Image Settings, choose the JPEG quality from the Image Quality slider or dial it in.
- A quality setting of 90 is almost lossless, while a quality of 10 will very clearly show artifacts. See a comparison.
- Select, Repeat previous image if the image series has empty images.
- In the Display settings, define the size of the window in which the movie will play.
- If the window size is larger than the original image size, the image will be scaled up and blurry.
- Set the Frame Rate of the movie.
- Some browsers may not be able to play back the full 50 frames per second. Lowering to 30 fps may help.
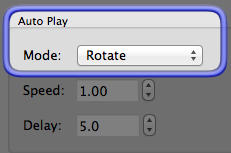
- The rotation speed also depends on the auto rotate speed. To find the right combination for your movie, you’ll have to play a bit.
- Choose a image scaling option for Stage Scaling and Image Scaling or leave at their default settings.
TIP: Choose With Window for Stage Scaling, for example, so the movie maintains its aspect ratio. - Choose to have the movie rotate automatically by choosing a Mode.
- Select Enable zoom, to allow the user to zoom in and out of the movie. This is handy when Multiresolution is enabled.
- Choose a skin for the movie.
- Simplex.ggsk is our latest pre-installed skin. If the object movie window is small, you may need to make some changes. For this, check out our Skin Tutorial.
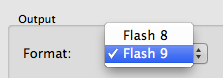
- Choose the Flash output format (Flash 8 or 9).
- In the Advanced Settings Tab, set the Sensitivity to control the movement relative to the mouse’s movement.
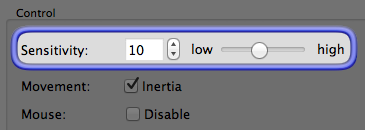
- Keep Inertia selected to have the movie start and end it’s movement/rotation with mass/inertia.
- In the HTML tab, check that the the HTML file is enabled and select a Template and customize.
- Finally, click OK to output the project.
- Unless specifically changed, all files will be saved in the same folder that contains the original image series.


See also
Using the Light Table (Object2VR)
Importing with Select Input (Object2VR)
Flash Output Settings (Object2VR)
Using the Skin Editor
JPEG Comparison (Object2VR)