The following will explain how to output a QuickTime VR movie. The general workflow for this is to adjust the QuickTime settings and then adjust the HTML settings for exporting an HTML file to add to your website. For a more complete tutorial, please check out the Getting Started tutorial.
Customizing the QTVR Settings
- In the Output section of the main project window, choose QuickTime as the Output Format from the menu and click, Add. This will open the QuickTime settings.
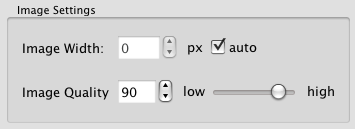
- Starting with the Image Settings, set the width of the image or select auto to use to the original width of the image.
-
- Choose the JPEG quality from the Image Quality slider or dial it in.
- A quality setting of 90 is almost lossless, while a quality of 10 will very clearly show artifacts. See a comparison.
-
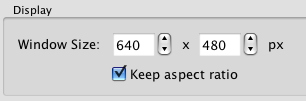
- Next, in the Display section, define the size of the window in which the movie will play.
-
- Remember, if your window size is larger than than the size of your image, your image may appear blurry because it is being scaled up to fit in the window.
-
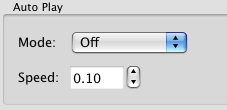
- If you want your movie to rotate automatically or Auto Play, set Mode to either Rotate or Ping-Pong.
-
- Set the speed at which the movie will move.
- 0.10 is the default and refers to a speed of one tenth of a degree per frame.
-
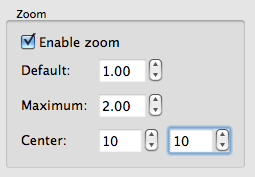
- If you would like the user to be able to zoom into your object, then enable zoom by selecting Enable zoom.
-
- Keep the default zoom level at 1.00 or if you would like the movie to be already zoomed in, once it is opened, set this to a higher percentage.
- Choose the maximum level of zoom. Don’t forget to think about clarity when zooming in. If you want the user to zoom in with good quality at the maximum zoom level, be sure that 1)your image width is larger than the window width and 2)the quality of the image is high to begin with.
- Adjust the center of the zoom.
-
- In the Output section, choose Open to save the movie to a new location, or to simply check it is being saved where you like.


Customizing the HTML template
Exporting an HTML page with the project is helpful in many ways; particularly for embedding your object movie on a website. You can later customize the template to your liking.
- In the QuickTime Output window, go the HTML tab and enable the HTML file by selecting, Enable HTML file.
- There is only one template to choose from here: normal.ggt.
- In the Template Parameters, you can customize several things:
-
- The first section allows you to change the text and background color of the page. You can also choose to show the QuickTime controller.

- If you want to include the information you entered in the User Data section, select Include Userdata Table.
- Next, you can change the Border, Text, and Background colors of the User Data Table if you wish.
- Select Use DevalVR if you plan to use the DevalVR player.

- In the final section, embed a sound file by choosing Open and pick your sound file and give it title in the Sound Title field.
Note:MP3 files only!
- The first section allows you to change the text and background color of the page. You can also choose to show the QuickTime controller.
-
- Next, in the Output section choose the format of the HTML page: either .html or .htm and then choose Open to save the HTML template.
Tip: Save your HTML template in the same folder as your movie file. - Finally, click OK to output the movie. Object2VR will ask you if the output file should be created now. Click, Yes to output the movie, or No to return to the main project window and continue working.


