Connecting a Polygon Hotspot to the Skin
Polygon Hotspots don’t connect directly to the skin, like point hotspots with the hotspot template. But, they can be connected using the Hotspot Proxy ID.
Connecting to the skin will let you do much more with the polygon hotspots, like changing the polygon’s color when the mouse rolls over it, style the text, pop up images, and more. Here, we’ll explain how to toggle the color of multiple polygon hotspots when a mouse enters it.
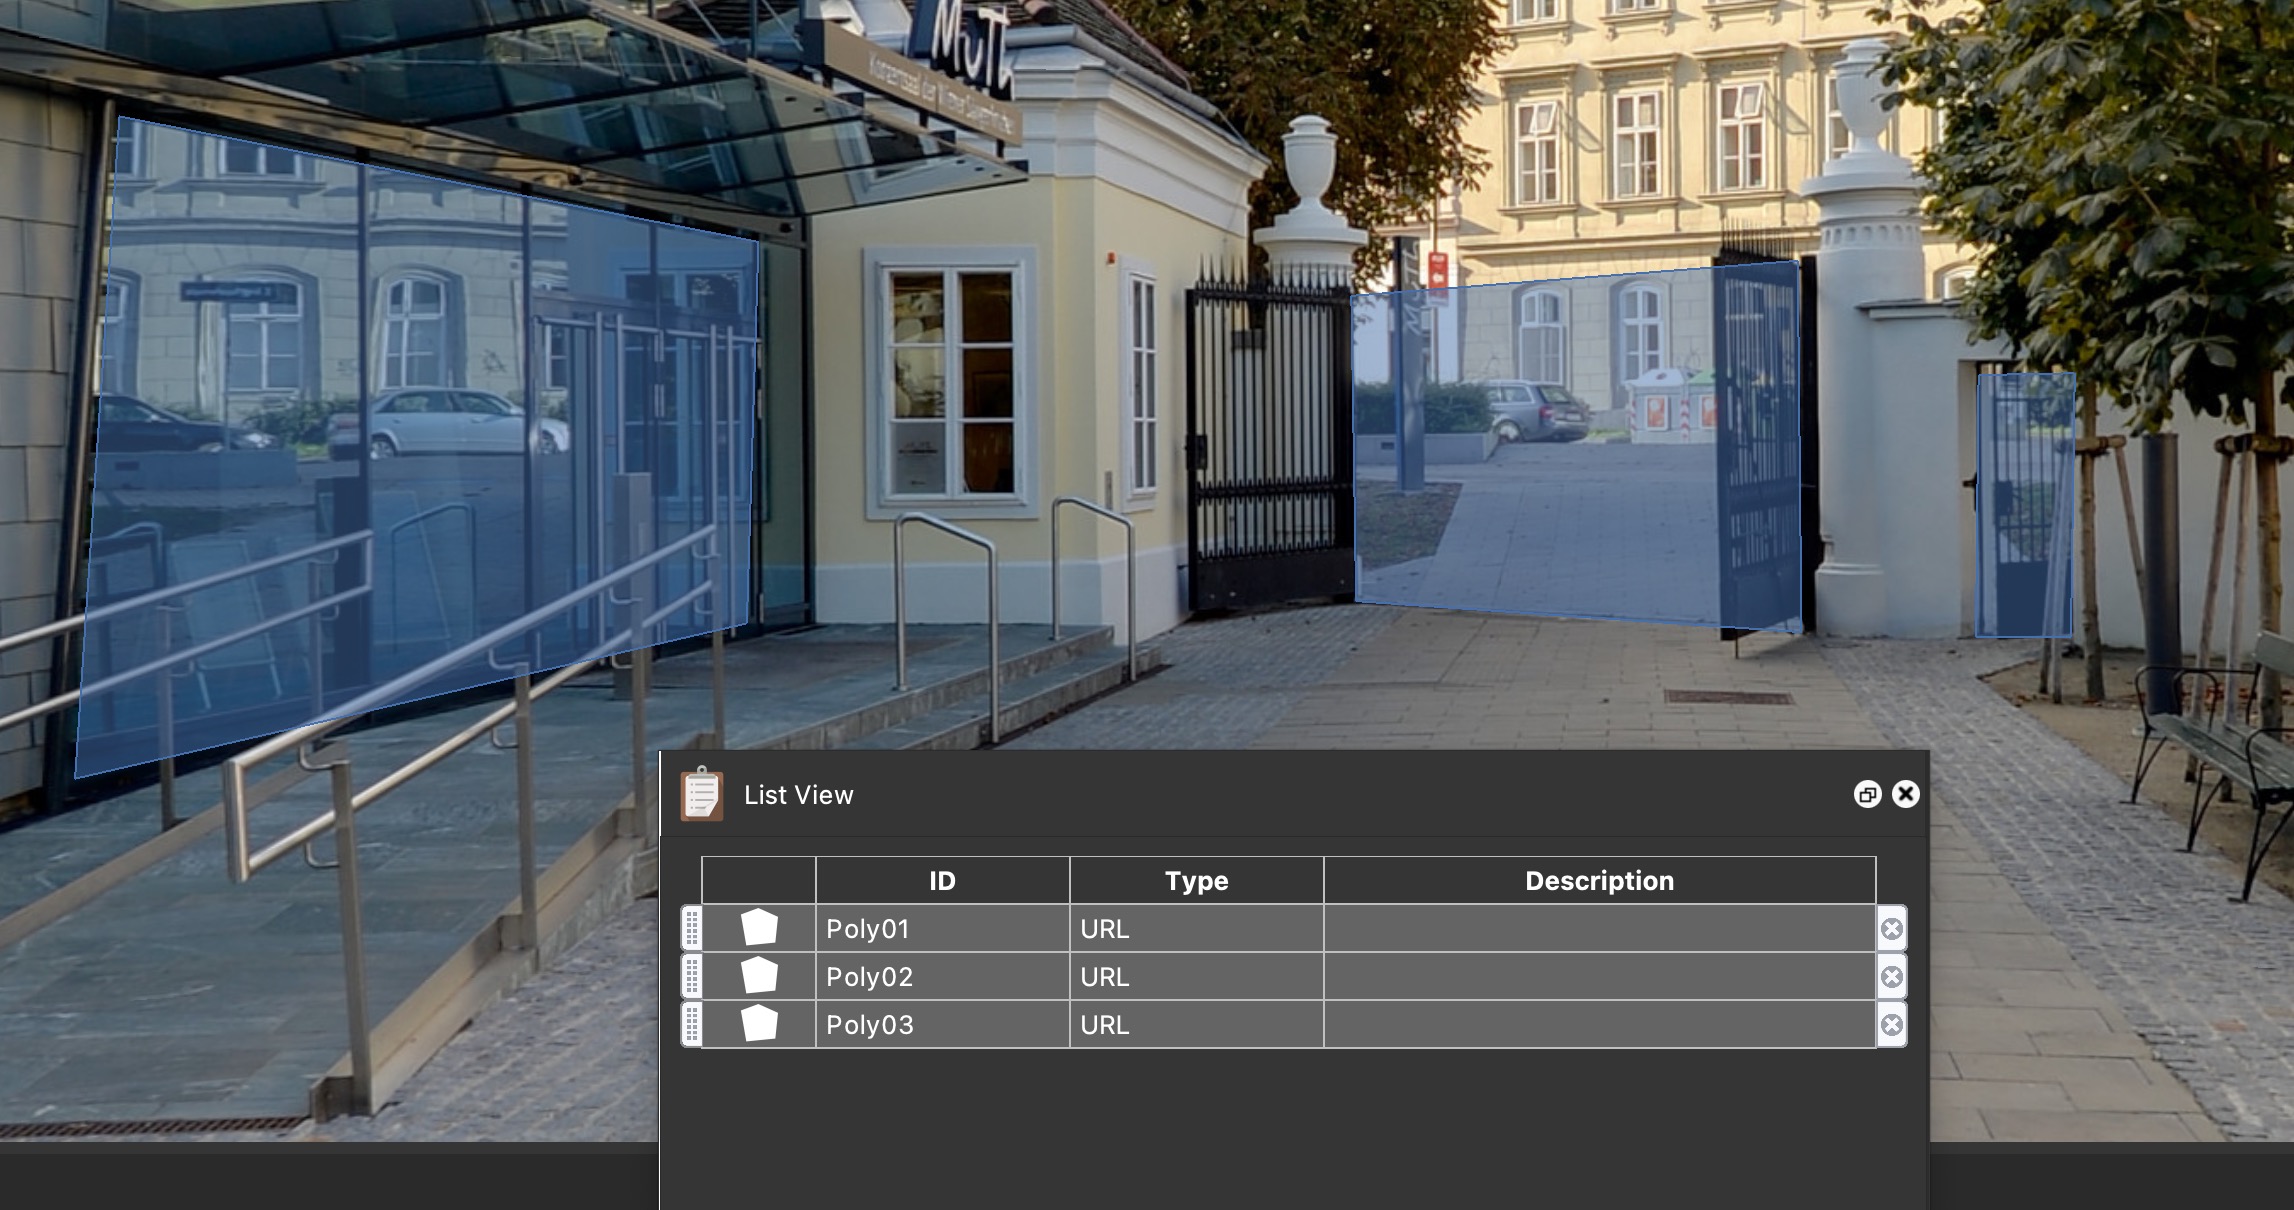
Create the Polygon Hotspots
- Draw three polygon hotspots.
-
Give each hotspot a unique ID. Pano2VR will automatically provide unique IDs, but you can change them.
-
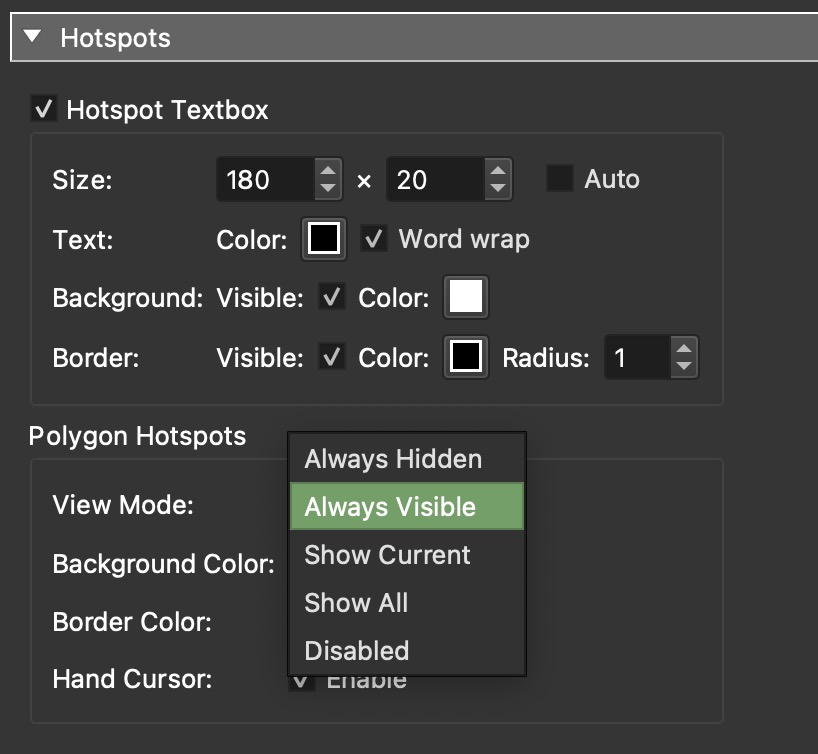
Open the HTML5 output settings and navigate to the Hotspots panel. In the Polygon Hotspots settings, change the View Mode to Always Visible.
-
[Optional] Change the default background and border colors of the polygon hotspots.
Toggle the Polygon Hotspot’s Colors
There are a few ways to do this, depending on what you want to happen. You can have one hotspot trigger the color change for all, have all hotspots trigger the color change, or change the color of a single hotspot.
Single Hotspot Triggers Color Change for All
For this first exercise, we will have a single polygon hotspot that will trigger a color change for all polygon hotspots when a mouse enters it.
- Open the Skin Editor.
- Add a Container. (Or add a text field, button, or rectangle.)
-
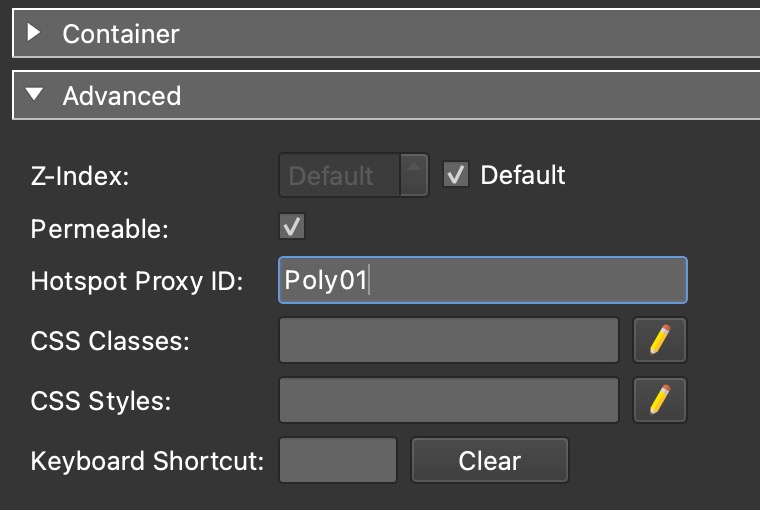
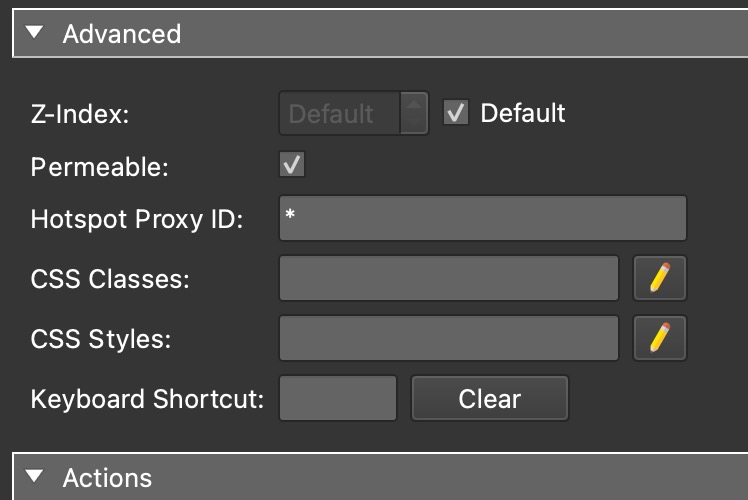
Add a Hotspot Proxy ID. Go to the container’s Advanced panel, and in the Hotspot Proxy ID field, add the ID of one of the polygon hotspots. This ID belongs to the polygon hotspot that triggers the color change.
-
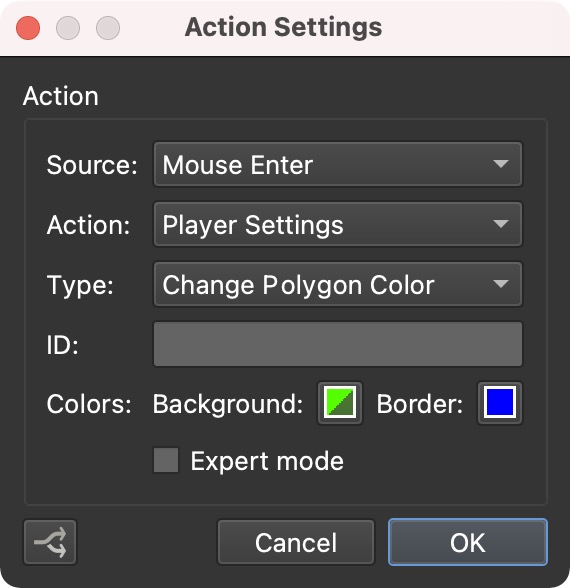
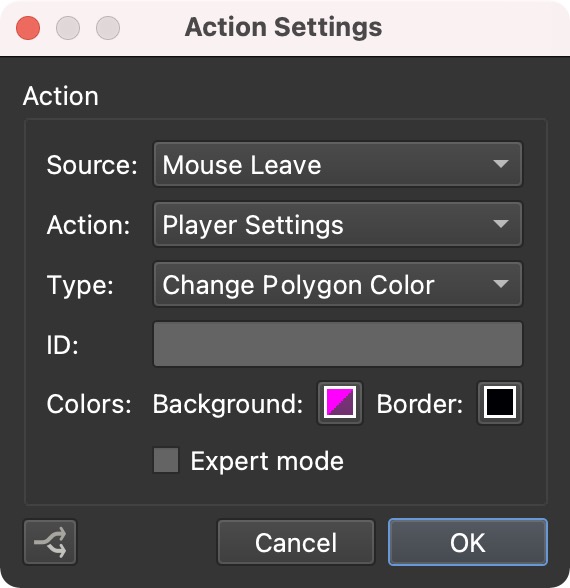
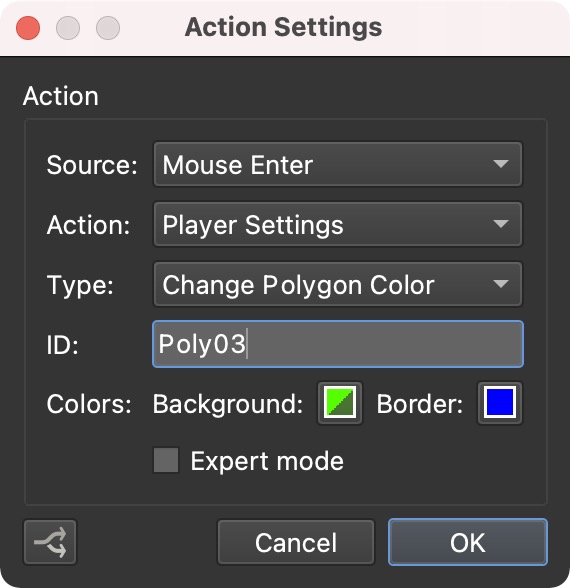
Add an action for when a mouse enters the polygon hotspot. In the Actions panel, double-click to add a new action:
* Source: Mouse Enter
* Action: Player Settings
* Type: Change Polygon Color
* Color: Define the colors -
Add an action for when the mouse leaves the polygon hotspot.
★ Use a shortcut to copy the action just made: right-click, choose Copy, then right-click again and choose Paste. Or on your keyboard, use Command-C and Command-V for macOS and Ctrl+C and Ctrl+V for Windows.
Double-click the copied action to open it. Change Mouse Enter to Mouse Leave and then change the colors.
-
Save the skin.
-
Output and test the project.
★ You can save and generate the current output without leaving the Skin Editor using the keyboard shortcut, Option-Command-G (macOS) and Ctrl+Alt+G (windows).
Now, when the mouse enters the Polygon hotspot specified in the Hotspot Proxy ID, all the hotspots will have their colors changed.
All Hotspots Trigger Color Change for All
In the skin, keep all the same settings as done in the previous section, but use an * in the Hotspot Proxy ID field instead. The asterisk addresses all hotspots (polygon and point hotspots).
Save the skin and output the project. Now, when the mouse enters any polygon hotspot, all hotspots’ colors will change.
Change the color of one hotspot
If you want to have all the polygon hotspots change the color of a single hotspot, add an * to the Hotspot Proxy ID field as in the previous section
Then, in both actions, add the ID of the target hotspot.
Save the skin and output the project. Now, any hotspot will change the color of only the polygon hotspot specified as the target.
