Point Hotspot Properties
Point Hotspots are interactive points that open websites, PDFs, videos, informational texts, and more. This article covers all the properties of a point hotspots.
The hotspot properties are in the Properties Panel and appears once a hotspot is added or selected.
Switch to Master Node – This button appears only when the selected hotspot comes from the tour’s master node while another node is open in the Viewer. Click it to switch to the master node.ID
The ID of the Point Hotspot. You’ll find this ID addressed in the Skin Editor and listed in the outputted XML. Pano2VR automatically assigns the IDs in consecutive order. They can be renamed.
If the ID is already assigned to another hotspot in the same node, a warning icon appears next to the field. Click the warning icon to generate a unique ID.
Type
Choose what the hotspot does when it’s clicked. The type decides which fields appear under Type Parameters below.
URL – Opens a website or a file, for example https://www.example.com.
Image – Clicking on an image hotspot results in opening an image. Click the folder button for Link Target URL to navigate to an image. Or drag an image to the Viewer to add an Image type point hotspot.
Video – Show a video when the hotspot is clicked. When Video is selected, a menu appears for you to choose the video’s Source: File, URL, YouTube, Vimeo. Drag in the YouTube or Vimeo video URL and Pano2VR recognize it.
Info – Use this to popup an information window displaying the text entered for Title and Description.
PDF – This hotspot opens a PDF. Drag PDFs to the Viewer to create the hotspot, or navigate to the file using the open file button for Link Target URL.
Skin-ID
Use the Skin-ID to connect this hotspot to a hotspot template. For example, if there is a hotspot template called, wiki, and you would like a point hotspot to take that template’s characteristics, you would enter, wiki, in this field. The menu lists the hotspot template IDs found in the skins assigned to the project’s web outputs.
Depending on the point hotspot’s type, the Skin-ID will be prefilled with an ID
that’s used by the hotspot templates in the built-in skin. For example, an
info type point hotspot will have the Skin-ID of ht_info. This can be
overwritten if your skins don’t use the same convention.
Title
Add the title of the hotspot here. This title is visible when the mouse pointer hovers over the hotspot. For example, a tooltip.
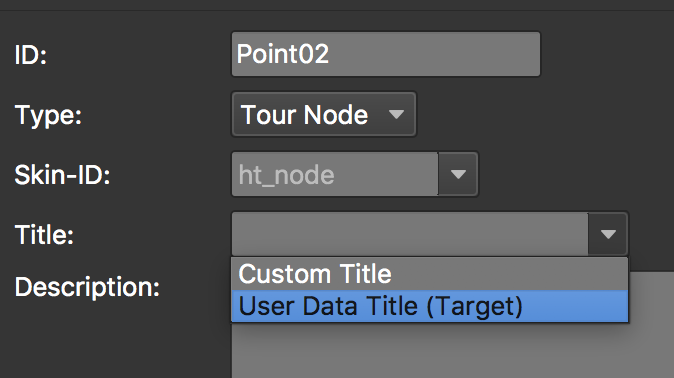
If the hotspot type is Tour Node, you can choose between a custom title or to use the title of the connecting node (User Data Title of the linked node). When Custom Title is selected, click the edit button to enter the title in a multi-line text box.
Description
Enter a description of the hotspot here or text for an information pop-up box. If you plan to use an information hotspot template, the description would appear in the info pop-up box.
Type Parameters
The options here will depend on what is chosen for Type.
The file field found in Image, Video File, and PDF, has a context menu. Right-click in field to bring up the menu.
URL and Info
Link Target URL – Enter the web URL or path.
Target – Add a target to specify where/how to open the website (or panorama). This determines if the URL is opened in a new browser window, in the same window, etc. Use the Copy button to copy the same target to all point hotspots in the project.
| Target | Action | |
|---|---|---|
_blank |
Opens the linked document in a new window or tab | |
_parent |
Opens the linked document in the parent frame | |
_self |
Opens the linked document in the same frame as it was clicked | |
_top |
Opens the linked document in the full body of the window |
Tour Node
Tour Node – Choose a node from the menu. Click the green arrow (Follow Hotspot Link) to open the linked node. The Follow Hotspot Link button is only available with a Pro license.
Target View – Specify the view that the linked node opens with.
-
Enter Target – Enter the Pan, Tilt, and Field of View in this field. This will override the default view settings in viewing parameters of the target node when entering through this hotspot. Enter the parameters separated by forward slashes (
/), for example324.0/-3.5/70.0. -
Forward – Use Forward to ensure that the target direction always moves forward in a tour. This will override the default view.
-
Backward – Use Backward to look back to the previous node when arriving at the target node.
For example, in a tour with 3 nodes (node1, node2, and node3), you may want the connection from node1 to node2 to node3 to have the forward target and the connection from node3 to node2 to have the backward target, so you can immediately move back to node 2 once you arrive at node 3.
-
Stay in Place – This option is only available when the linked node is a 3D model.
Target Viewing Parameters – Click the bullseye button to open this dialog. It shows the linked panorama; turn it to the view the node should open with, then click OK. This option is only available for Tour Node type hotspots.
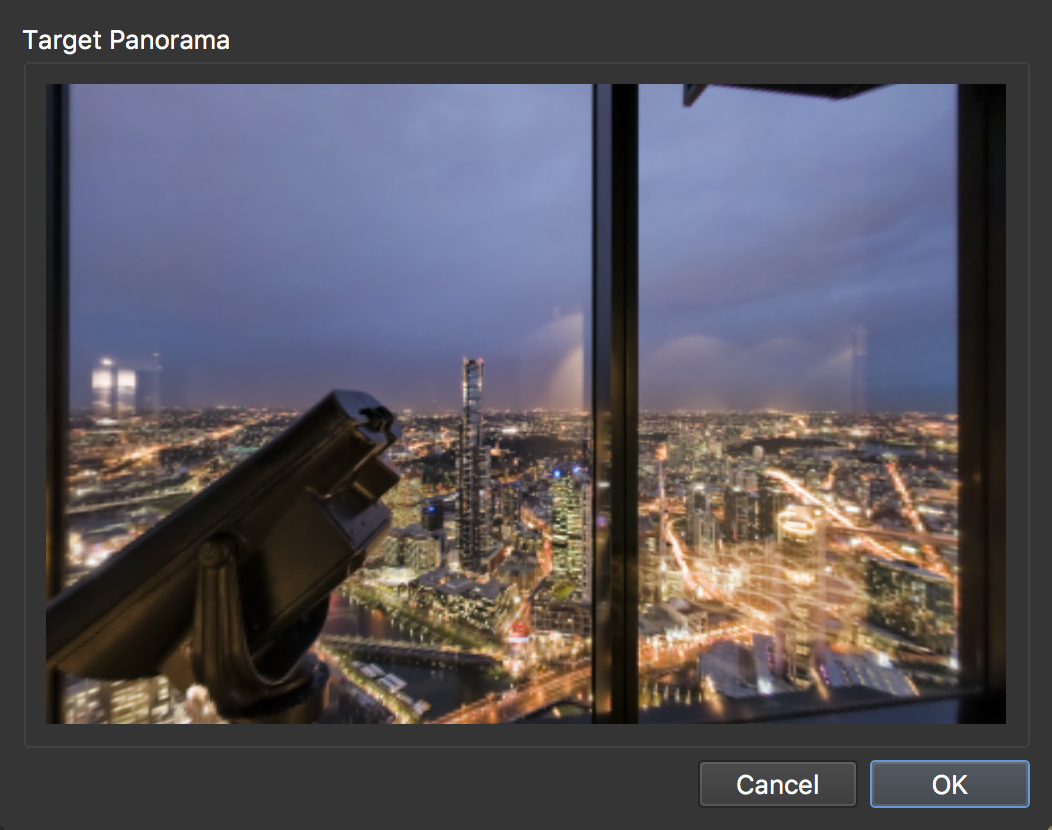
When the linked node is a 3D model, the bullseye button opens the Model Target View dialog instead, which sets where the camera is placed in the model:
- Target Camera – Choose one of the model’s target cameras or camera points, or Custom Point to enter a position yourself.
- Position – The camera position in the model. It can only be edited for a Custom Point; otherwise it comes from the chosen camera.
- Pan, Tilt, and FoV – The camera’s view direction and field of view. A target camera brings its own values: deselect the checkbox under From Target Camera next to a value to enter your own.
- Camera Mode – How the viewer moves in the model after arriving: Orbit, Fly, Walk, Fly Over, or Panorama.
Copy Target – Click the copy button to copy the target to all Tour Node point hotspots. If several nodes are selected in the Tour Browser, you can choose whether to copy the target to all nodes or only to the selected nodes. This option is only available for Tour Node type hotspots.
Distance – Enter the distance between nodes. The distance is entered in meters or feet, depending on the Units chosen in the Settings. If the panoramas have GPS, distance can be determined automatically by selecting Auto.
Image
Image File – Click the folder icon to navigate to the image file.
Target – Add a target to specify where/how to open the website (or panorama). This determines if the image opens in a new browser window, in the same window, etc. Use the Copy button to copy the same target to all point hotspots in the project.
| Target | Action | |
|---|---|---|
_blank |
Opens the linked document in a new window or tab | |
_parent |
Opens the linked document in the parent frame | |
_self |
Opens the linked document in the same frame as it was clicked | |
_top |
Opens the linked document in the full body of the window |
Video
Source – Select the video source. Depending on the chosen video source, specify the file, web URL or Youtube/Vimeo URL below:
-
Video File – Click the folder icon to navigate to the video file.
-
Video URL – Add the URL of the video. The URL can also point to an HLS stream (
.m3u8). -
YouTube ID – Add the YouTube share link. Time stamp links are supported, for example
https://youtu.be/ElPYmmlcUh8?t=307. -
Vimeo ID – Add the Vimeo URL. For example,
https://vimeo.com/694838103.
When the source is Video File, more options are available:
Alternative File(s) – Other versions of the video, for example in another codec or at a lower resolution, for browsers and devices that can’t play the main file. The player picks the best file the browser supports, so the order of the files doesn’t matter. Add up to three alternative files; a new field appears as soon as the previous one is filled. Click the gear button next to a field to convert the video into an alternative file with the built-in converter.
Subtitles – Adds a subtitle track to the video. New hotspots start without subtitles.
- None – The video has no subtitle track.
- Automatic – Pano2VR uses a
.vttor.srtfile with the same name as the video, and translated files with a language suffix, liketour_de.srt. The files that were found are listed below the menu. - File – Choose a specific subtitle file in Subtitle File.
SRT files are converted to WebVTT on output. The browser shows the subtitles as native captions on the video.
The alternative files and subtitles play in the skin’s video element, so the project’s web output needs a skin with a video hotspot template.
PDF File – Click the blue folder icon to navigate to and add the PDF file. Or drag the PDF to the space to the left of the folder icon add the file.
Target/Start Page – If the skin supports PDF hotspots (includes a PDF Element), enter the page number for Start Page. If the skin does not support PDF hotspots, indicate how to open the PDF in a browser.
| Target | Action | |
|---|---|---|
_blank |
Opens the linked document in a new window or tab | |
_parent |
Opens the linked document in the parent frame | |
_self |
Opens the linked document in the same frame as it was clicked | |
_top |
Opens the linked document in the full body of the window |
Auto Place / Lock Position
For Auto Place, both the current node and the node you are linking to need GPS data. It is selected by default when activating a ghost hotspot and is signified with a lock symbol on the hotspot. This means that if the GPS data or North of one of the two linked nodes changes, the hotspot will be automatically placed in its new, correct location.
If you wish to move the hotspot to a different location, deselect Auto Place and move the hotspot or change the Pan and Tilt parameters.
A point hotspot can be locked even if it does not have location data.
Autoplaced nodes will show in List View with a padlock indicating that they are autoplaced and locked. To unlock it, double-click it in List View, then deselect Auto Place / Lock Position in the hotspot settings or Shift-click the hotspot in the Viewer.
Position
On panorama nodes, the hotspot’s position is set with Pan and Tilt. Click the keyframe button next to Position to create animation tracks for this hotspot in the currently active animation clip. Click the button again to delete the tracks.
Pan
Adjust the placement of the hotspot along the horizontal axis.
Tilt
Adjust the placement of the hotspot along the vertical axis.
Position, Rotation & Scale
When the point hotspot is placed in a 3D model node, the Pan and Tilt settings are replaced by the following fields:
Position – The hotspot’s position in the 3D model (X, Y, Z). Double-click the Position label to reset the position.
Rotation – The hotspot’s rotation around the three axes in degrees. Double-click the Rotation label to reset the rotation.
Scale – Scale the hotspot by a factor between 0.01 and 100.
Custom Image
Here, you can quickly assign a hotspot a custom image. This is useful for when a specific image is needed for one particular hotspot. For instance, if you are using a skin, but one hotspot needs a different image/icon, you can add it here. Likewise, you can add a custom image without having to create and add a skin.
Add the custom image by clicking the folder and navigate to the image. Once the image is added, it’ll be visible in the Viewer. To resize the image, drag on the red handles.
You can also pick an icon from the Components Toolbox: click the toolbox button next to the folder button, select an icon, and confirm. The icon is copied into an icons folder inside the project folder, so save the project first.
- Width and Height – The image’s dimensions in pixels. Click Reset to restore the image’s original dimensions.
- 3D Distorted – When selected, the image distorts with the panorama as if it were part of the scene. In a panorama node, the field of view (FoV, 1° to 179°) then replaces Width and Height and sets the hotspot’s size. In a 3D model node, Width and Height stay.
Custom Properties
If your project needs more properties, you can add them as custom properties. Click the plus button to add a new custom property. A dialog will appear where you can define the parameters:
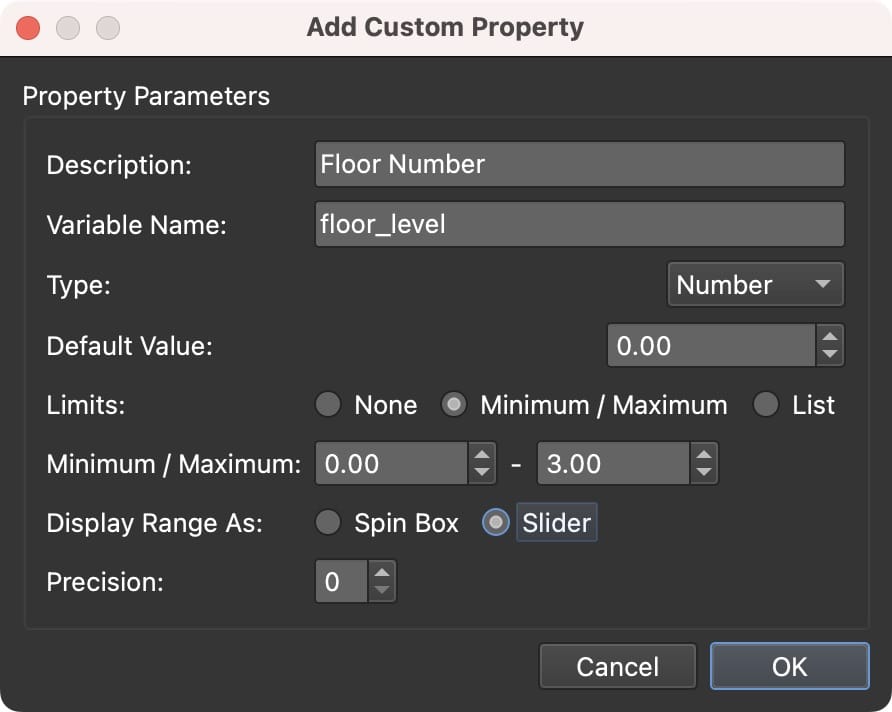
A custom property is a variable that can be used in the skin. For Type, choose from Text, Number, or True/False.
For each type, you can control how the variable is displayed by setting Limits:
- None – No limits. For Text, this gives a single text field. For Numbers, an editable number chooser. For True/False, a dropdown list.
- Maximum/Minimum – Set a range for number variables. Enter the minimum and maximum values, and choose to display the range as a number chooser (Spin Box) or as a Slider. Use Precision to set the number of decimal places.
- List – Create a list of options as key-value pairs. For example, Key =
1, Value =Hello; Key =2, Value =World. You can display the list as a Dropdown (combo box), a Color Combo Box (use Hex color codes for the Key), or as radio buttons (multiple choice).
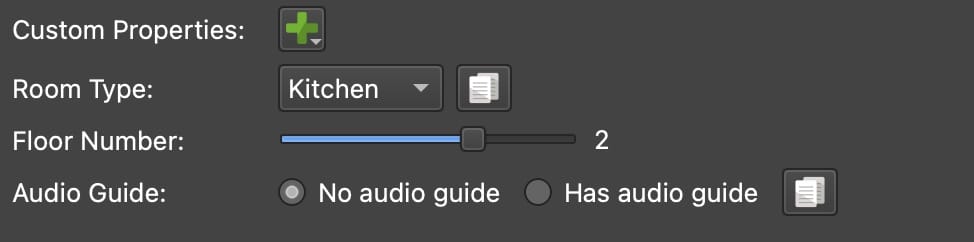
When you open a skin from the Web Output, any custom properties created here will be added as variables in the skin properties.
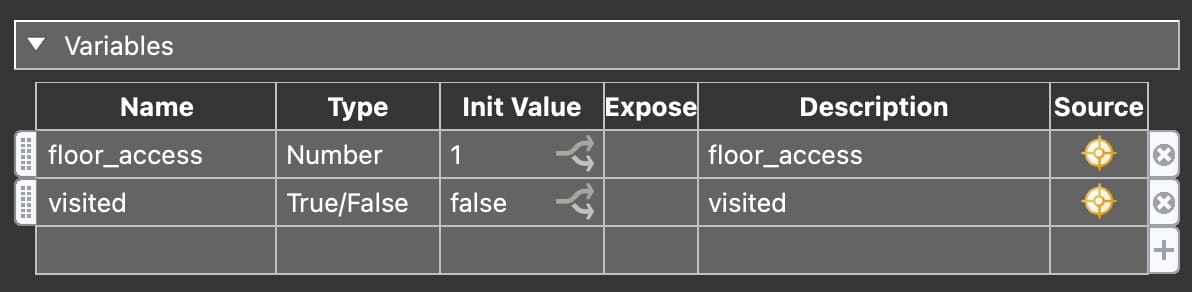
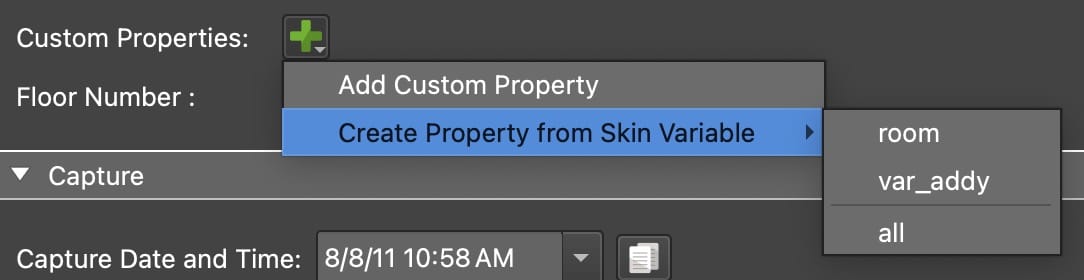
You can also create a custom property from an existing
skin variable. Long press the
plus button to create a custom property from a skin variable.
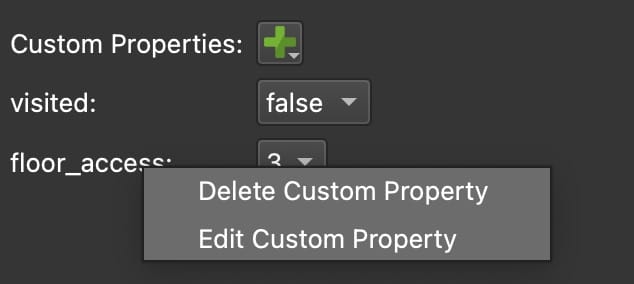
Right-click the label of a custom property to edit or delete the property.
Learn how to add custom properties.